Since Rails 2.0 fucked up just about every single online tutorial out there by removing the scaffold method, I decided to document a step by step process of starting a brand new project. I think it’s important because the approach changes. In the past you could start from designing database, and then work your way from there. This is no longer the case.
I’m using SITS as an example here. What is SITS? As far as you are concerned it is my little vaporware project that exist only in my feeble mind, and as a empty google code page. Oh, and it also exists as part of the monstrous 45,000 line php craziness I maintain at work. It used to be an individual PHP project at one point, then it got swallowed by the all purpose evaluation and report tracking monster and extracting it from there proved to amount almost to a total rewrite. I figured – why not use Rails and learn something along the way?
So let’s get started. First thing we want to do is to actually create a project. I’m assuming you have Ruby, Rails and MySQL installed. Don’t touch the database yet. Btw, I’m using windows because I don’t feel like switching machines for this – sue me.
Go go gadget RAILS:
C:\projects>rails sits
      create
      create  app/controllers
      create  app/helpers
      create  app/models
      create  app/views/layouts
      create  config/environments
      create  config/initializers
      create  db
      create  doc
      create  lib

      --- snip ---

      create  log/server.log
      create  log/production.log
      create  log/development.log
      create  log/test.log
It’s a whole lot of output so I snipped it. You will also note I’m using C:\projects as my directory. This is actually a junction that points somewhere else, but you don’t need to worry about this. I just got annoyed that the paths were so long they were causing my code box scroll sideways so I C:\projects to my real projects folder.
Anyways, on to configuration. \project\sits\database.yml is the database config file – and practically the only config file we will need to write for this project. I have set it up like so:
development:
  adapter: mysql
  database: sits_dev
  username: root
  password: [passwd]

test:
  adapter: mysql
  database: sits_test
  username: root
  password: [passwd]

production:
  adapter: mysql
  database: sits_prod
  username: root
  password: [passwd]
I’m using the root account right now because we will be using built in rails magic to add and drop tables and do all kinds of other fun things. Once the project is ready for production, I will probably go back and change this to a locked down user which only has select, update and delete privileges for the tables it needs. As a side note, when you edit this file make sure that the config lines for each environment are indented exactly two spaces. No more no less. I mean, unless you enjoy cryptic errors – cause you gonna get plenty if you fuck up the layout. It’s kinda like in python, but only for this file. Ruby itself doesn’t really care about indentation that much.
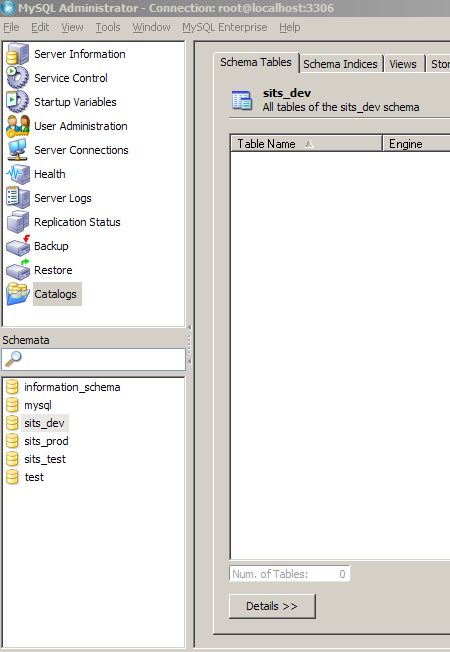
Let’s create the 3 databases:
C:\projects>rake db:create:all
Yup, rake is like fucking magic – you don’t even need to touch MySQL tools. I touched them though to verify the databases were created:
We have the databases now, now it’s time for scaffolding. What about models, you ask? What about controllers? Scaffolding does that for us. The bad part is that we need to roughly know what do we want to scaffold from the get-go. I kinda know what I’m doing since I did this once already in php and then fucked it up by integrating it into a monster that will one day devour my soul. So have an idea of what we should be designing. I will start with user table because it is stand-alone (ie. it does not belong_to or is not composed_of anything). Our user will have a username, a password (hashed of course), an email (naturally), account creation date and user level. The level will of course be on a scale from luser to admin, and I will use numeric values to represent them. Why? Because I used enums in the past and I ended up with contraptions like lpuser (low priv user), superuser, superadmin, and etc.. Numeric level system is easy to extend.
C:\projects\sits>ruby script\generate scaffold User username:string
	password:string created_at:datetime level:integer
      exists  app/models/
      exists  app/controllers/
      exists  app/helpers/
      create  app/views/users
      exists  app/views/layouts/
      exists  test/functional/
      exists  test/unit/
      create  app/views/users/index.html.erb
      create  app/views/users/show.html.erb
      create  app/views/users/new.html.erb
      create  app/views/users/edit.html.erb
      create  app/views/layouts/users.html.erb
      create  public/stylesheets/scaffold.css
  dependency  model
      exists    app/models/
      exists    test/unit/
      exists    test/fixtures/
      create    app/models/user.rb
      create    test/unit/user_test.rb
      create    test/fixtures/users.yml
      create    db/migrate
      create    db/migrate/001_create_users.rb
      create  app/controllers/users_controller.rb
      create  test/functional/users_controller_test.rb
      create  app/helpers/users_helper.rb
       route  map.resources :users
Can you see what I’m doing here? I’m specifying the fields and their data types as arguments for the scaffold script. These fields will be included in my views, and I will also get an automagical database migration file. I can go in and edit it adding extra fields that won’t show up in the views if I want to. To do so I just need to open the db\migrations\001_create_users.rb file:
class CreateUsers < ActiveRecord::Migration

  def self.up
    create_table :users do |t|
      t.string :username
      t.string :password
      t.datetime :created_at
      t.integer :level
      t.timestamps
    end
  end

  def self.down
    drop_table :users
  end
end
Note - I didn't write that code. Rails did. Neat huh? All I needed to do was to specify bunch of field names and data types. What data types can you use in a migration (or when specifying scaffold)? I think the list is as follows:
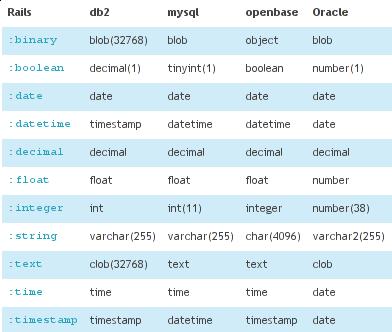
List is courtesy of the Rails Migration Cheatsheet. They have an expanded version of this table on their site - I just stole a piece of it for quick reference.
What now? We can use our old friend Mr. Rake:
C:\projects\sits>rake db:migrate
(in C:/projects/sits)
== 1 CreateUsers: migrating ===================================================
-- create_table(:users)
   -> 0.0630s
== 1 CreateUsers: migrated (0.0630s) ==========================================
In effect we should see two new tables in the _dev database like this:
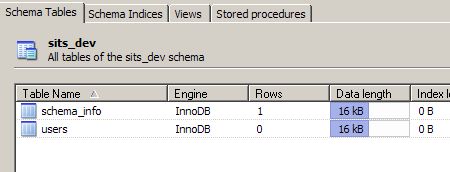
Just to be sure, let's look at the schema of the users table to make sure everything is correct:

Yup, everything works! Now let's launch this shit! I'm using Mongrel instead of WebRick because it is ♪Harder, Better, Faster, Stronger♪. Also it has a picture of a dog on it's webpage so clearly it must be superior. Not even mentioning the Win32 service support that ma To install mongrel just do:
gem install mongrel
To start it, simply navigate to the project and run:
C:\projects\sits>mongrel_rails start
** Starting Mongrel listening at 0.0.0.0:3000
** Starting Rails with development environment...
** Rails loaded.
** Loading any Rails specific GemPlugins
** Signals ready.  INT => stop (no restart).
** Mongrel 1.1.2 available at 0.0.0.0:3000
** Use CTRL-C to stop.
I actually have no clue why the default mongrel output displays the ip as 0.0.0.0 instead of 127.0.0.1 but I assure you it works. We can test it by simply navigating to http://locahost:3000/Users
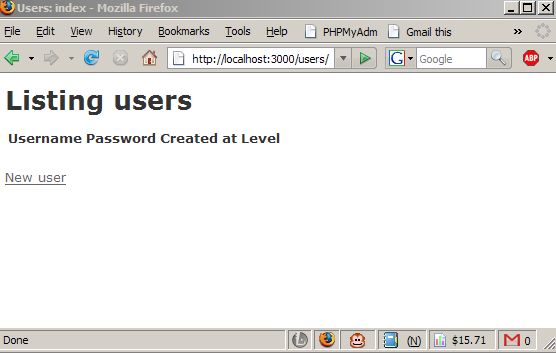
All the CRUD actions are supported here so I can easily add a new user by simply hitting a link on the bottom of this page:
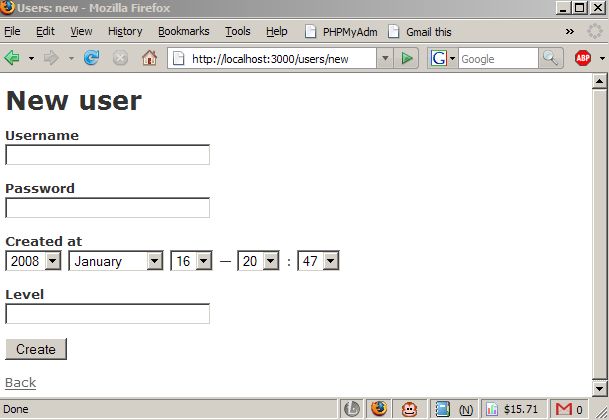
I don't really like the creation date dialog - it probably would be smoother if the date got appended automatically at the moment of creation. But I think this is something I can easily change by editing either controller or the view. As it is right now the password is not getting encrypted so this is another bit that we need to fix But this is pretty much the point of scaffolding - it gives you a starting point, not really a complete solution.
Is this better than the old way? On one hand having the code generated for you is nice. On the other hand the auto-generated code might be a little bit confusing to a newbie. The dynamic scaffold gave you a blank slate you could fill out by coding from scratch. Now we get a pile of cryptic code that needs to be deciphered before we can move on. Perhaps we will learn better this way, but I'm not sure. I kinda like the from-scratch approach. But there is not much I can do about it other than downgrading to a previous version of Rails. :P
That's all I have for today. I mostly just wanted to document all the little things you need to do to start a scaffolded project from scratch. I might post more as I re-write SITS but I guess that really depends on whether or not I run into any interesting problems, or cool Rails thing I want to talk about.
[tags]rails, ruby on rails, ruby, sits, simple issue tracking system, scaffold, scaffolding, rails 2.0[/tags]
so this way when browsing to http://localhost:3000/users it will have all whole CRUD, which obviously should only appear in the “admin” area.
How can I separate the views like:
http://localhost:3000/users
(and)
http://localhost:3000/admin
T.I.A.
Rails 2.0 automatically adds a timestamp field to your database, which notes creation and last update date/time, so your created_at field is redundant.
I created a starter project recently that includes authentication, testing, image uploads, and other items in a beginning project. It is based on rails 2.3.2. It can be found on github and a more thorough explanation can be found on my website. Hope this helps!